
I recently moved my blog from http to https. I use Cloudflare’s SSL to do that. I moved my DNS records from GoDaddy to Cloudflare DNS.
After 2 days I noticed that I’m not receiving any emails to my G Suite email address [email protected] and all business emails that associated with socialpositives.com. This is because I lost all the MX records.
I noticed that I have to add G Suite MX records to Cloudflare’s DNS section. This is really easy but you can’t find any simple guide to do this. That’s why I decided to write the simple steps to Add G Suite MX records to Cloudflare to receive Email after moving http to https.
1. Sign in to your Google Admin console.
2. Log in to your Cloudflare account
3. Select the website
4. Open the Cloudflare DNS from the top
5. In the DNS Records section, select MX from the Type drop-down list.
6. Fill the fields
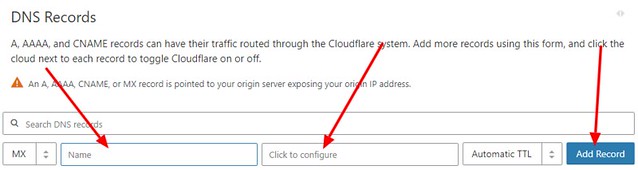
- Enter @ in the Name field
- Click the Click to configure field and it will Pop.
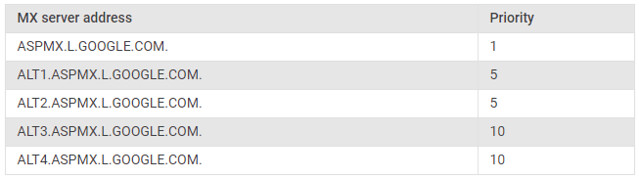
7. In the Server field, enter ASPMX.L.GOOGLE.COM Include the period at the end of the MX record
8. In the Priority field, enter the priority value 1.
9. Add all MX server address records and priority values from the table below.
The records can take several hours to update, so you might not immediately get new email messages in Gmail. If you are an existing business G Suite email users you will start to receive emails within minutes.